How to Properly Prep Your Home for Exterior Painting: A Complete 2025 Guide
How to Properly Prep Your Home for Exterior Painting: A Complete 2025 Guide
Painting the exterior of your home is more than just picking a color and brushing it on. The preparation work you do beforehand directly affects the durability, appearance, and longevity of your paint job. Many homeowners make the mistake of skipping key prep steps, leading to peeling paint, uneven finishes, or worse—having to repaint within just a few years.
In this detailed guide, we’ll walk you through step-by-step how to properly prepare your home for exterior painting, including tools, techniques, and professional tips for a flawless finish that lasts for a decade or more.
Why Proper Preparation is Essential
Exterior surfaces endure sun, wind, rain, and fluctuating temperatures year-round. If the surface isn’t clean, smooth, and properly primed, paint won’t adhere well, and damage can occur sooner.
Proper preparation ensures:
-
Better adhesion of paint
-
Longer-lasting results (often 10+ years with quality work)
-
Protection against moisture and mold
-
Professional, even finish
If you want your home to stand out and remain protected, you must invest in the prep work.
Step 1: Inspection and Planning
Before you begin, inspect your home’s exterior for:
-
Cracks or gaps in siding or trim
-
Rotting wood that needs replacing
-
Peeling or blistering paint
-
Signs of mold or mildew
-
Rusty nails or screws
Take notes and make a plan. You’ll need to address these issues before painting.
Pro Tip:
If your home was built before 1978, test for lead paint. If lead is present, you must follow EPA lead-safe guidelines or hire a certified contractor.
Step 2: Gather the Right Tools
Here’s a checklist of common tools for exterior prep work:
-
Power washer or garden hose with scrub brush
-
Paint scrapers
-
Sanding blocks or orbital sander
-
Putty knife and exterior filler
-
Exterior caulk and caulking gun
-
Drop cloths and plastic sheeting
-
Safety goggles, gloves, and dust mask
-
Extension ladder
Investing in quality tools will make the job safer, faster, and more effective.
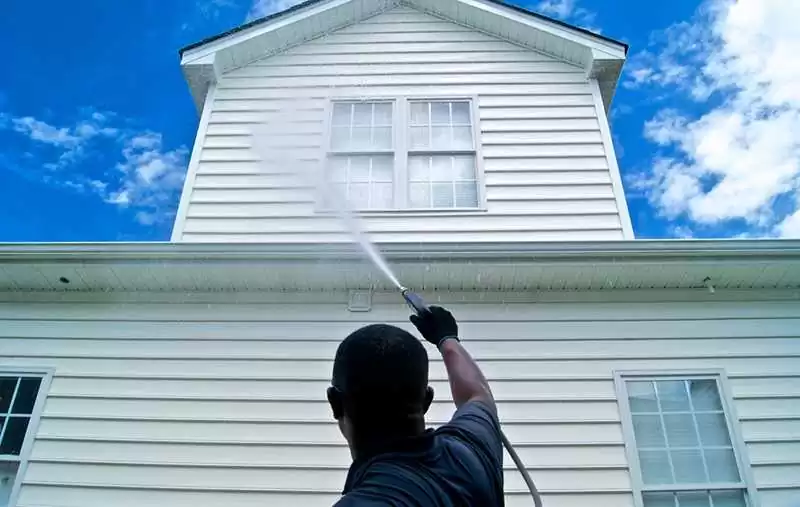
Step 3: Cleaning the Exterior
Painting over dirt, dust, and mildew is a recipe for disaster.
Use one of the following methods:
-
Power Washing: Best for removing dirt, chalking, and loose paint.
-
Hand Scrubbing: Gentle alternative for older homes with delicate siding.
-
Mildew Treatment: Mix one part bleach with three parts water, scrub affected areas, and rinse well.
Let the surface dry completely before moving to the next step—usually 24 to 48 hours.
Step 4: Removing Loose Paint
Flaking or peeling paint must be removed so the new coat adheres properly. Use:
-
A paint scraper for large loose pieces
-
A wire brush for stubborn areas
-
Sandpaper to feather edges so the transition from bare wood to painted surface is smooth
Safety Tip: Always wear a dust mask, especially when dealing with old paint.
Step 5: Repairing and Replacing Damaged Surfaces
Repairing damage before painting prevents moisture intrusion and further deterioration. Common repairs include:
-
Filling small cracks and holes with exterior-grade filler
-
Replacing rotted wood
-
Securing loose boards or trim
-
Removing rust from metal surfaces
Let all repairs cure according to manufacturer instructions.
Step 6: Sanding
Sanding creates a smooth surface for primer and paint to stick to. Use medium-grit (80–120) sandpaper for rough areas and fine-grit (150–220) for final smoothing.
If sanding large areas, an orbital sander can save hours of work.
Step 7: Caulking
Seal all gaps, especially around:
-
Windows and doors
-
Trim boards
-
Siding seams
Use high-quality exterior caulk that’s paintable. This step improves energy efficiency and prevents water intrusion.
Step 8: Priming the Surface
Primer creates an even base and helps paint adhere better. Types of primers:
-
Oil-based primer: Great for bare wood and stain blocking
-
Latex primer: Flexible, dries quickly, ideal for most surfaces
-
Bonding primer: Best for glossy or tricky surfaces
Apply primer evenly and allow it to dry completely before painting.
Step 9: Protecting Surrounding Areas
Use drop cloths to protect walkways, shrubs, and decks. Cover windows, doors, and fixtures with plastic sheeting or painter’s tape.
Step 10: Final Pre-Paint Checklist
Before opening your paint cans:
-
Surfaces are clean and dry
-
Loose paint is removed
-
Repairs and sanding are complete
-
All gaps are sealed
-
Primer is dry
-
Surroundings are protected
Common Mistakes to Avoid
-
Skipping cleaning — paint will fail quickly
-
Not allowing surfaces to dry fully — leads to blistering
-
Using interior caulk outside — it will crack and shrink
-
Skipping primer — especially on bare wood or metal
-
Painting in bad weather — high humidity or extreme temps ruin results
When to Hire Professionals
If your home is large, has multiple stories, or has significant repairs, hiring a professional exterior painting company like Lifetime Guaranteed House Painting in Orlando, Florida can save time, ensure safety, and deliver a finish that lasts decades.
Final Thoughts
Prepping your home for exterior painting isn’t glamorous, but it’s the single most important step for ensuring your investment lasts. Whether you do it yourself or hire a pro, taking the time to clean, repair, sand, and prime will pay off with a stunning paint job that protects your home for years to come.
Category: Exterior House Painting Techniques
← Back to Blog